

How To Clean A Pick-and-Place Machine Regularly
Regular cleaning of a pick-and-place machine is essential to maintain its performance, accuracy, and longevity. Dust, debris, and residue from solder paste or adhesives can accumulate over time, leading to reduced efficiency, placement errors, and even machine breakdowns. Below is a...
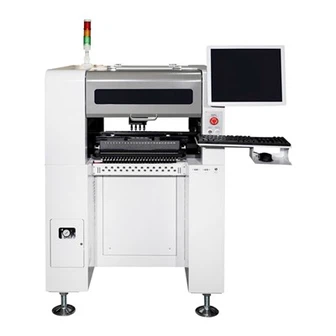
Product Introduction
Regular cleaning of a pick-and-place machine is essential to maintain its performance, accuracy, and longevity. Dust, debris, and residue from solder paste or adhesives can accumulate over time, leading to reduced efficiency, placement errors, and even machine breakdowns. Below is a comprehensive guide on how to clean a pick-and-place machine regularly.
1. Preparation Before Cleaning
Power Off the Machine: Always turn off the machine and disconnect it from the power supply before starting any cleaning procedure to ensure safety.
Gather Cleaning Tools: Prepare the necessary tools, such as lint-free cloths, isopropyl alcohol, compressed air, brushes, and vacuum cleaners.
Wear Protective Gear: Use gloves, safety glasses, and anti-static wrist straps to protect yourself and prevent damage to sensitive components.
2. Cleaning the Placement Head and Nozzles
Remove Nozzles: Carefully detach the nozzles from the placement head according to the manufacturer's instructions.
Clean Nozzles: Soak the nozzles in isopropyl alcohol to dissolve any solder paste or adhesive residue. Use a soft brush to gently scrub away stubborn debris.
Inspect Nozzles: Check for wear and tear or blockages. Replace damaged or clogged nozzles to ensure optimal performance.
Clean the Placement Head: Use a lint-free cloth dampened with isopropyl alcohol to wipe the placement head. Avoid touching sensitive sensors or cameras.
3. Cleaning the Feeders
Remove Feeders: Take out the feeders from the machine and inspect them for dust or debris.
Clean Feeders: Use compressed air to blow away loose particles. Wipe the surfaces with a lint-free cloth and isopropyl alcohol.
Check Component Tape Path: Ensure the tape path is free of obstructions and replace any worn-out tapes or reels.
4. Cleaning the Conveyor System
Remove Debris: Use a vacuum cleaner or compressed air to remove dust and debris from the conveyor belts and tracks.
Wipe Surfaces: Clean the conveyor surfaces with a lint-free cloth and isopropyl alcohol to remove any residue.
Inspect Rollers and Guides: Check for wear and ensure smooth movement. Lubricate if necessary, following the manufacturer's guidelines.
5. Cleaning the Vision System
Clean Cameras and Lenses: Use a lens cleaning solution and a microfiber cloth to gently clean the cameras and lenses. Avoid scratching the surfaces.
Check Lighting: Ensure the lighting system is free of dust and functioning properly. Replace any faulty lights.
6. Cleaning the Machine Interior
Vacuum the Interior: Use a vacuum cleaner with a soft brush attachment to remove dust and debris from the machine's interior.
Wipe Down Surfaces: Use a lint-free cloth and isopropyl alcohol to clean internal surfaces, including the PCB support pins and rails.
Inspect for Residue: Check for any solder paste or adhesive buildup and clean it thoroughly.
7. Lubrication and Calibration
Lubricate Moving Parts: Apply lubricant to moving parts such as rails, guides, and bearings as recommended by the manufacturer.
Calibrate the Machine: After cleaning, perform a calibration check to ensure the machine's accuracy and alignment are maintained.
8. Post-Cleaning Checks
Reassemble Components: Reinstall all cleaned components, such as nozzles, feeders, and conveyor belts, ensuring they are properly aligned.
Run a Test Cycle: Power on the machine and run a test cycle to verify that it is functioning correctly and placing components accurately.
Document Maintenance: Record the cleaning and maintenance activities in the machine's log for future reference.
Tips for Effective Cleaning
Follow the Manufacturer's Guidelines: Always refer to the machine's user manual for specific cleaning instructions and recommended cleaning agents.
Schedule Regular Cleaning: Establish a cleaning schedule based on the machine's usage and production environment (e.g., weekly, monthly).
Train Operators: Ensure operators are trained in proper cleaning procedures to avoid damage to sensitive components.
Conclusion
Regular cleaning of a pick-and-place machine is crucial for maintaining its performance, accuracy, and reliability. By following the steps outlined above, you can prevent downtime, reduce errors, and extend the lifespan of your machine. A well-maintained pick-and-place machine ensures consistent production quality and maximizes efficiency in your SMT assembly line.
Hot Tags: how to clean a pick-and-place machine regularly, China, manufacturers, suppliers, factory, customized, wholesale, cheap, pricelist, low price, buy discount, Smt Machine, HW-T4-50F Pick And Place Machine Table, HW T8 80F Pick And Place Machine, HW-DSQ800-120F Pick And Place Machine, HW-T8-80F Pick And Place Machine, HW-T4-44F Pick And Place Machine
You Might Also Like


Send Inquiry